How to Measure Sheet Resistance using a Four-Point Probe

The most common technique used for measuring sheet resistance (surface resistance) is the four-probe method. This technique involves using four equally spaced, co-linear probes to make electrical contact with the material. Most four-point probes available commercially use sharp needles as probes. These can scratch or pierce delicate materials often used in thin film electronic devices. This can make it difficult to take accurate sheet resistance measurements, and result in the thin film becoming unusable.
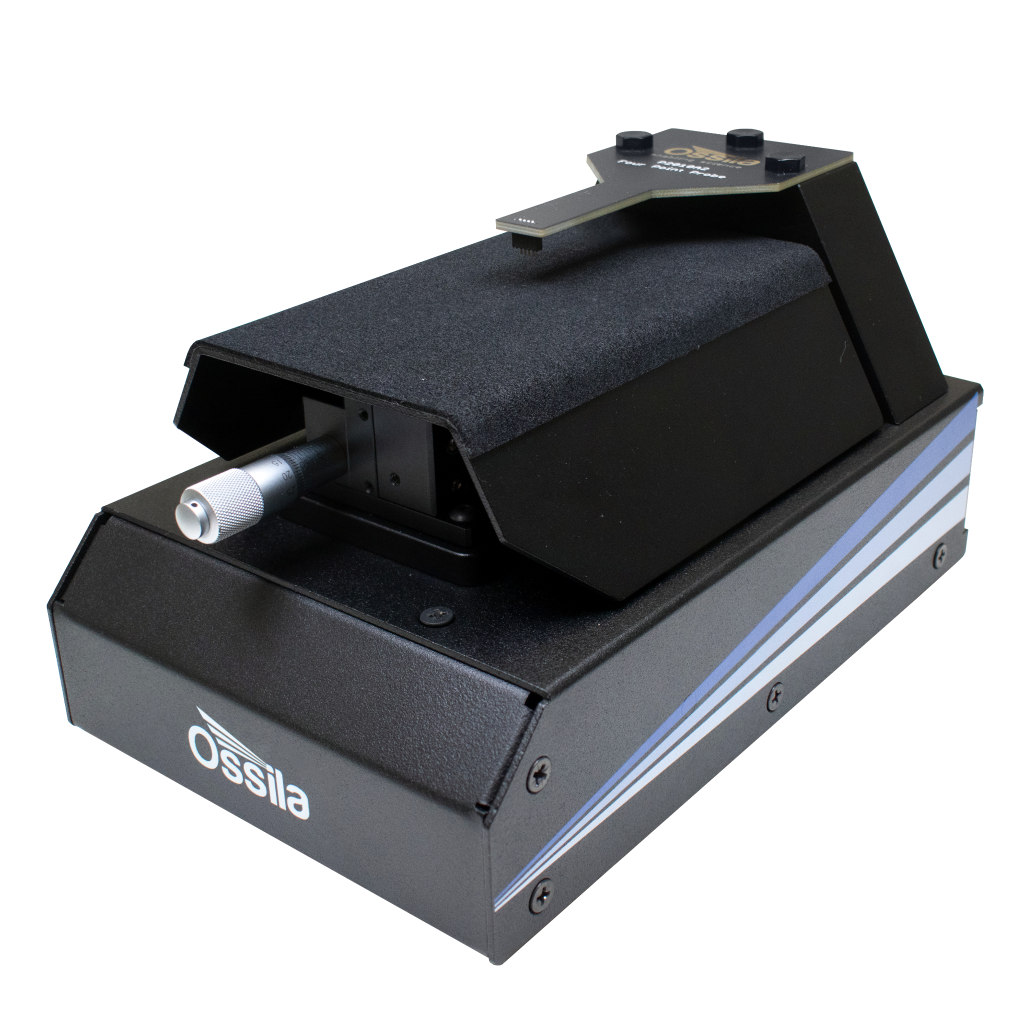
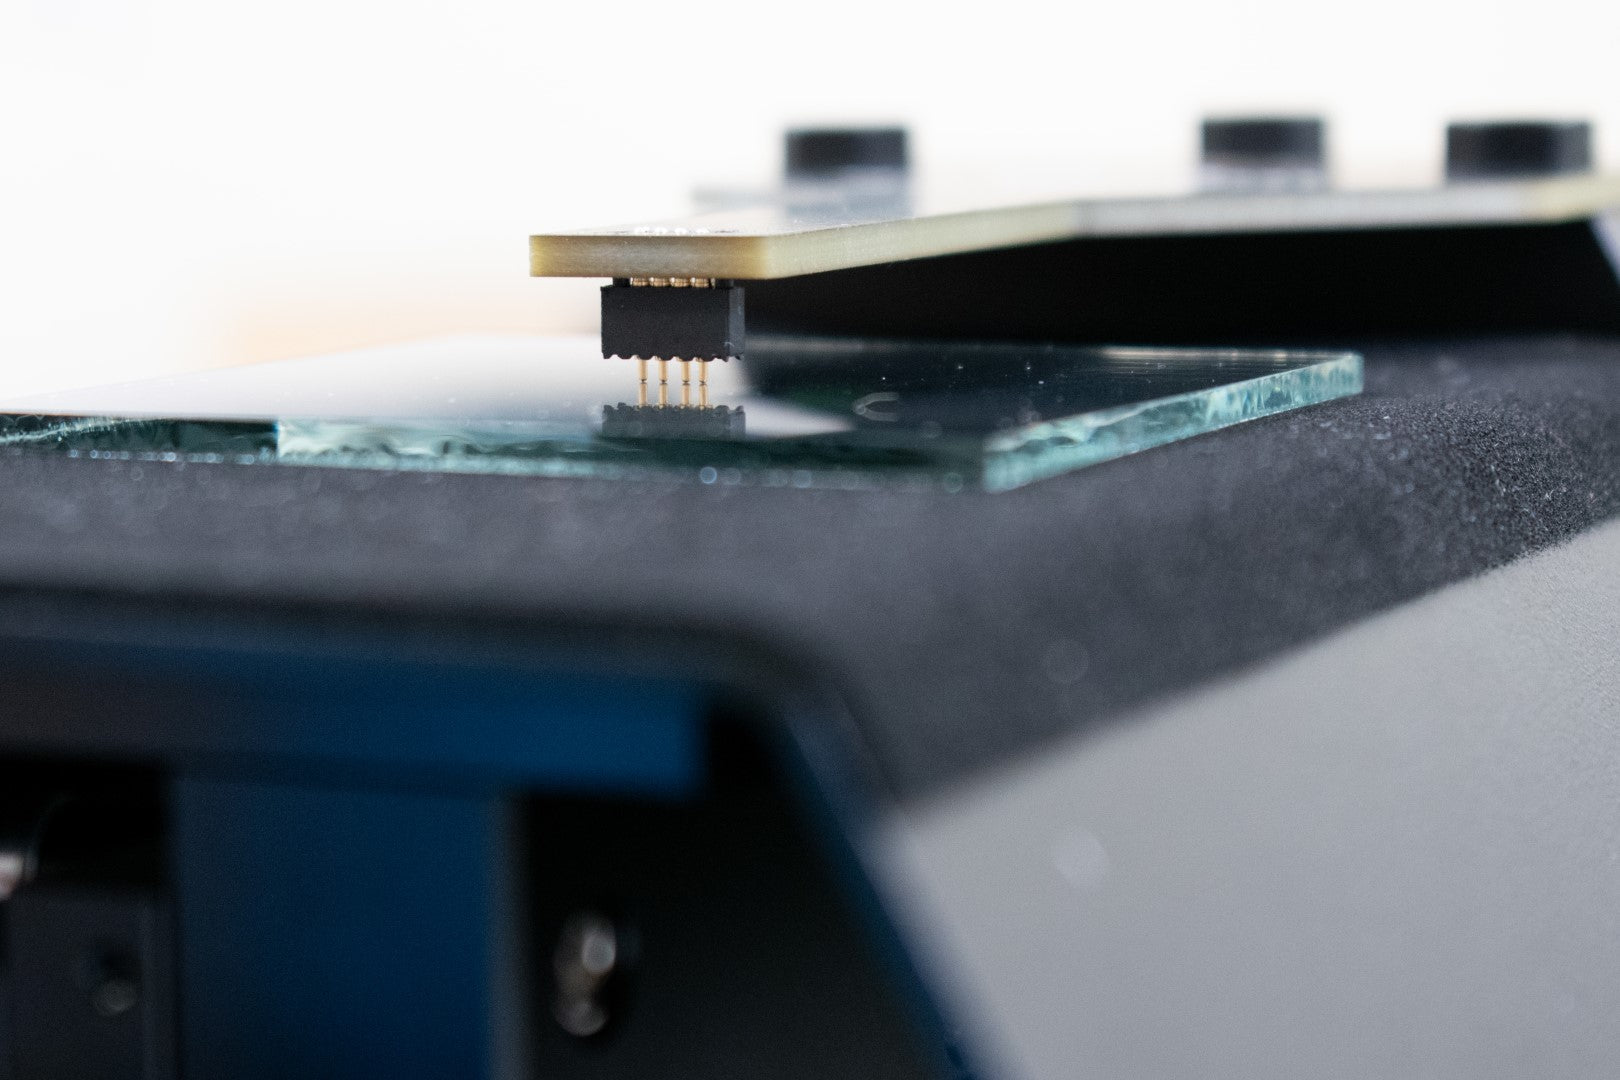
The Ossila Four-Point Probe was designed to overcome these issues. This system uses spring-loaded probes with rounded tips that apply a constant 60 grams of force whilst in contact. Additionally, contact is made using a precision vertical translation stage that is operated with a micrometre to allow for soft, controlled contact with the sample.
This guide gives an overview of how to use the Ossila Four-Point Probe System, as well as some general tips and tricks for measuring sheet resistance.

Sheet Resistance Measurements
When performing sheet resistance measurements, there are several factors that need to be taken into consideration.
Firstly, the current source and voltmeter must be completely isolated from one another. If this is not the case, then current may flow across the voltmeter. This will cause contact resistance and wire resistance to contribute to the measured voltage drop, preventing accurate measurement of the sheet resistance.
Spacing between the probes should be equidistant. This is key to the analysis and derivation of the sheet resistance equation, resulting in the elimination of the separation as a variable. Measurements can be performed using varied probe spacing, however additional correction factors will be required.
The shape and ratio of sample size to probe spacing will determine whether a geometric correction factor is required, and the value of the correction factor. For example, a circular sample will have a correction factor based upon the ratio of the sample diameter to probe spacing. A rectangular sample, however, has a correction factor based upon the ratio of the long edge to the short edge, and the short edge to the probe spacing. In addition to these, there are also correction factors accounting for thickness and probe positioning, as well as differently shaped samples. More information about correction factors can be found in our Sheet Resistance Theory Guide.
Using the Ossila Four-Point Probe Measurement System
Sample Preparation
Electricity follows the path of least resistance. This means that when performing a four-point probe measurement, your sample or material must be the least resistive component of the system.
For sheet resistance measurement, layers should be significantly thinner than the spacing between the outer probes. The resistance is therefore greater laterally (along the sample) than it is through it.
Therefore, if your sample layer is placed on a less resistive layer, the current will instead travel along this less resistive layer (see figure). At best, this will result in a sheet resistance measurement of the less resistive layer. However, it is more likely this will result in meaningless data. Either way, you will not get a measurement of the layer you are interested in.
For example, if you were to layer a semiconductor on top of a metal, the current would travel along the metal layer instead of the semiconductor as it offers lower resistance to the electricity.
For sheet resistance measurements, do not deposit your sample on a substrate that is less resistive (or more conductive) than your sample.
Sheet Resistance Measurement Video
Below is a video demonstrating the use of the Four-Point Probe System. For a full description, please see the written guide following the video.
Initial Set Up
First install the system software by running ‘Ossila-Sheet-Resistance-Lite-Installer-vX-X-X-X.exe’. This can be found on the USB drive provided with the system. Follow the on-screen instructions to complete the installation. Next, install the appropriate USB drivers. These can be found in the 'SMU-driver' folder on the USB drive.
Windows 10 will automatically install the correct driver when the system is plugged in. For other Windows versions, choose ‘Windows 32-bit SMU Driver’ for 32-bit windows or 'Windows 64-bit SMU Driver’ for 64-bit windows.
If installation of the drivers fails, or the system is still not recognized by the computer, please see our driver installation guide for steps to resolve this. Additionally, both the system software and the drivers can be downloaded from our Software and Drivers page. Please note, you do not need to install the USB drivers if you are intending to use an Ethernet connection with the system.
Finally, plug the system into the power supply and check that the lights and fan turn on, then plug the USB-B or Ethernet cable into the system. To ensure you are getting the most accurate results possible, please allow 30 minutes for the system to warm up before taking measurements.
Loading a Sample
Place the sample onto the vertical translation sample stage, ensuring that is it centred beneath the probes. For rectangular samples, the longer edge should be aligned parallel to the probes. Using the micrometer, carefully raise the stage to make contact between the probes and the sample. When the probes have retracted most of the way into their casing, there should be good contact with the sample.

If the probes are not in contact with the centre of the sample, the sample should be repositioned before performing the measurement. Do not attempt to reposition the sample whilst the probes are in contact, as this may cause damage to both the sample and the probes themselves. First, lower the stage so that contact is broken, then reposition the sample and re-establish contact.
Performing a Measurement
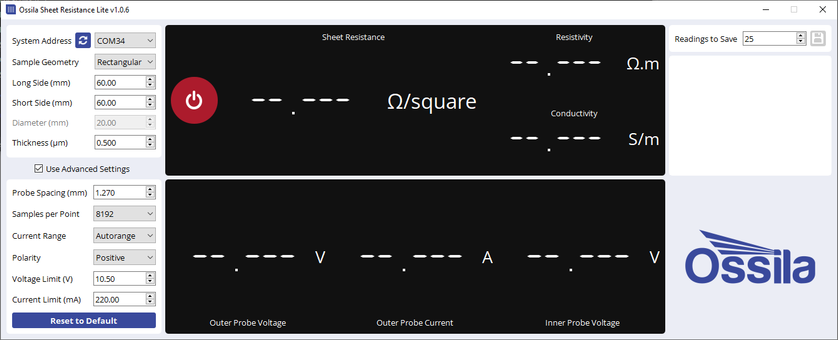
Start up the Ossila Sheet Resistance Lite software and wait for the window to open. If the system is connected to the computer via USB or network via Ethernet, the software will automatically detect the system upon start-up and display the corresponding COM port or IP address respectively in the ‘System Address’ box. Note that if there are other systems, that use an Ossila Source-Measure Unit, connected to the computer, these will also be detected and added to the ‘System Address’ box.

Set the geometry for the sample in the software. This must be provided so that the appropriate geometric correction factor can be calculated. Correction factors account for increased resistances that will be measured for samples with dimensions lower than 40 times the probe spacing (50.8 mm for the probe spacing of 1.27 mm). These larger resistances arise from the limitation of current pathways when the probes are close to boundaries. The sample thickness is optional if it is less than 40% of the probe spacing (508 µm for probe spacing of 1.27 mm). However, samples thicker than this, require additional correction factors, so the thickness must be entered to ensure accurate measurements.
Once the geometry has been set, click the on/off button to perform the measurement. The system will attempt to pass a current through the sample between the outer probes, starting with the highest current range and working downwards if a stable current cannot be achieved. Once a stable current has been achieved the software will measure the voltage between the inner probes and use it along with the outer probe current and geometric correction factors to calculate the sheet resistance and display it in the software. This measurement will continue until the on/off button is clicked again. If the sample thickness is provided, then the average resistivity and conductivity will also be displayed. If the system cannot apply a current between the outer probes the measurement will stop with a warning.

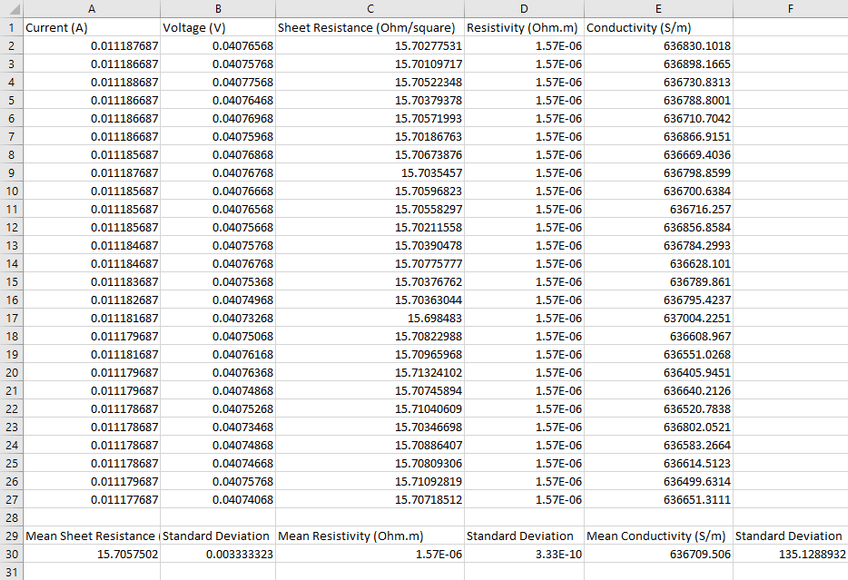
While the measurement is running, the data can be saved. Choose how many measurements you want to save in the 'Readings to Save' box, then click the save icon. You will be prompted to choose a directory and save file name. The software will save the specified number of measurements to a comma-separated value (.csv) or text (.txt) file. The mean and standard deviation of the sheet resistance (and resistivity and conductivity if a thickness is provided) is also saved below the raw data. An example data file is shown below.

Quick Start Guide
This guide is intended for those who have used the four-point probe system previously and need a reminder on the steps involved in performing a measurement.
- Install the software and drivers on the USB drive provided.
- Connect the system to the power supply.
- Allow the system to warm up for 30 minutes before performing a measurement.
- Connect the system to your computer
- Place the sample on the stage, centred beneath the probes.
- For rectangular samples, align the long edge parallel to the line of probes.
- Use the micrometer to raise the sample until it makes contact with the probes.
- To ensure good, ohmic contact between the sample and probes, complete at least one full turn of the micrometer after the probes first make contact with the sample.
- Start the Ossila Sheet Resistance Lite software.
- Set the sample geometry in the software.
- Click the on button.
- The program will calculate the appropriate geometric correction factor for the sample.
- Once a stable current has been achieved, the current between the outer probes and voltage between the inner probes is measured and used to calculate the sheet resistance.
- The system applies a current between the outer probes, starting at the highest current range and working downwards until a stable current is achieved.
- The sheet resistance is displayed in the program.
- If the sample's thickness is provided, the resistivity and conductivity will also be calculated and displayed.
- The measurement continues until the off button is clicked.
- Data can be saved at any point whilst the measurement is running by clicking the save icon.
Advanced Settings
By clicking the 'Use Advanced Settings' check box you can access some advanced features of the software, as well as see the voltage and current between the outer probes, and the voltage between the inner probes.

The advanced settings are briefly explained below:
Probe Spacing - Change the probe spacing being used if you are using a different probe head. This is important for ensuring the right geometric correction factors are being used.
Samples per Point - The sampling rate of the measurement. Increasing this will increase the accuracy of each measurement, but also increase the time it takes to perform.
Current Range - Select whether the program will automatically find the appropriate current range for the measurement or use a specific current range. This can speed up a measurement if you know the appropriate current range already.
Polarity - Choose whether to perform the measurement with positive or negative current.
Voltage Limit and Current Limit - Set the maximum voltage and current that can be applied to the sample. This can help prevent damage to delicate samples.
Any changes to these settings will only be used whilst the 'Use Advanced Settings' check box is ticked, and they can be reset to the default values by clicking the 'Reset to Default' button.
Tips and Tricks
Preventing Sample Damage
Whilst the probes of the Four-Point Probe System are designed, with rounded tips, to reduce the possibility of damaging thin films, damage can still be caused if the sample is moved whilst the probes are in contact. Therefore, it is recommended that the stage is sufficiently lowered before the sample is placed onto or removed from the stage, or just repositioned when centralizing beneath the probes.
Probe Positioning
When measuring sheet resistance, the position of the probes on the sample has a significant impact on the result. This is due to how the current flows through the sample, as the available current pathways will be vary depending on probe positions. The most accurate measurements for determining resistivity and conductivity are taken at the centre of the sample.
Four-Point Probe
