Cleaning, Maintenance, And Troubleshooting: Glove Boxes

The Ossila Glove Box uses automatic purging and programmable leak tests making it easy to maintain an inert environment. However, there are a number of steps that you can take to ensure that the inert atmosphere remains intact. These include performing regular cleaning and maintenance checks, following a standard operating procedure, using the antechamber correctly, and purging as required.
It is also important to be able to quickly identify, troubleshoot, and fix problems as they occur. Even if your system is properly maintained, leaks and other issues can occur during normal usage.
Glove Box Cleaning and Maintenance
To work safely and efficiently in a glove box, you need to follow the standard operating procedures for your laboratory and keep up with scheduled cleaning and maintenance.
Cleaning Procedure and Maintenance Checks
It is good practice to schedule regular cleaning and check-in sessions. For small systems, every 1-3 months will be sufficient. When doing a routine check-in:
- Check if the hands of the gloves are dirty or marked. If they are, wipe them down with an appropriate solvent. We recommend isopropanol or ethanol for butyl rubber glove box gloves. If this does not clean the gloves sufficiently, you may need to replace them.
- Once the gloves are clean, place a pair of XL nitrile gloves over the top of the gloves. This will prevent further solvent damage during cleaning, prolonging their lifetime.
- Wipe down the surfaces and walls of the chambers using an appropriate solvent. Make sure you collect any residue powders or contaminants which may have accumulated.
- Use isopropanol to remove marks from the inside of the glass screen.
- Remove and dispose of all cleaning materials (including the nitrile gloves) and other waste from the system via the antechamber.
- Begin a short, timed purge to remove any residual solvent vapours.
- Do a visual check of the gloves and any O-ring seals, making a note of any small cracks or tears. Even if small holes have not affected functionality of the system yet, they may do in the future. Tears in the gloves can be temporarily covered with black electrical tape.
- Check the sensor boards are functioning properly by checking the logbook for fluctuating O2 levels or by inspecting the sensors visually. For our glove box, the O2 and H2O data can be extracted using the USB connector.
- Perform a leak test to ensure all seals are intact.
- Check your nitrogen or argon supply for leaks to ensure you do not run out of inert gas.
Some glove boxes use a recirculation system which involves purifying materials (molecular sieves/catalysts). These materials will become saturated with moisture and oxygen over time and will therefore need to be "dried out" every so often. This is done by flushing the system with a mix of hydrogen and nitrogen at high temperatures and is known as regeneration.
How frequently you need to perform a regeneration depends entirely on how much you use your glove box. You may need to do a regeneration if the oxygen sensors are consistently reading values of >1ppm.
Troubleshooting
This section will provide answers to some common questions about the our lab glove box.
Is There a Leak in the Glove Box?
Leaks will compromise the inert environment and potentially ruin your experiment. Small leaks may lead to a slow increase of contaminants over time. Large leaks will prevent your glove box from functioning at all. Beware, that large leaks can also create a dangerous working environment.
There are some signs that could indicate there is a leak in your system. These include:
- A continuous increase in the O2 and H2O levels when the glove box is sealed.
- If the glove box is struggling to maintain pressure.
- If the system is using a larger amount of nitrogen than normal.
- A smell of solvent in the room if solvents are being used. However, this could also be through movement in and out of the antechamber.
- If the gloves are deflated and pressure is low. This is a sign of a serious leak.
What To Do if You Suspect a Leak
There are five basic steps which you should take if you suspect that there is a leak:
- Use the automated Ossila leak test, or alternative leak test, to confirm the presence of a leak.
- Visually inspect for tears in the gloves or O-ring seals on the antechamber door. If there is a tear on one of the gloves, it is likely that the O2 levels will increase when the gloves are squeezed.
- Check that all the bolts around the window are sufficiently tight.
- Spray down the outside of the glove box with soapy water and circulate nitrogen through the system. The over pressure will cause bubbles to form wherever nitrogen is escaping.
- If none of these steps solve the issue, it might be worth disassembling the glove box and ensuring all parts are clean and intact.
How to Protect Samples Outside of an Inert Environment
Glove boxes are very useful when working with materials that are sensitive to ambient conditions. However, you will probably need to take your samples out of the inert environment at some point. This may be to characterise samples or to transfer them to another location. Example situations may include:
- Travelling to a facility or measurement centre with ready-made air sensitive samples.
- Sending samples to be measured at other facilities.
- Transferring samples from one lab to another.
- Storage of samples over long time periods.
- Taking air sensitive samples to be measured or imaged.
There are several methods that can be used to take sensitive samples out of a glove box. For thin films, you can encapsulate your sample. The combination of UV-curable epoxy with a glass cover slide provides robust protection of any thin film sample. However, it is important to ensure that the process of encapsulation does not damage the sample.
If the material cannot be encapsulated, you may just have to limit the amount of time your sample spends in air. In this case, you can seal materials and samples in a vessel inside the main chamber to create a small, temporary inert environment. These sealing vessels can include screw-lid bottles, sealing in glass ampules or in vacuum-sealed bags. In desperate situations, zip lock bags will provide some protection against ambient conditions over a short time-frame. The sealing method you should choose depends entirely on your situation and your sample.
Can You Handle Powders in the Glove Box?
Handling powders in the chamber can be tricky. Problems with electrostatic charge may be an issue, and although there are actions which can be taken to reduce this, it is hard to eliminate completely. Additionally, pressure fluctuations can cause bottles to fall over. Therefore, it is especially important if there are any open bottles or exposed powders, that you push your hands into the glove box very slowly.
It is possible to weigh powders inside the chamber, but it is very difficult, as pressure fluctuations can cause inconsistent measurements. It is important if you are weighing inside the glove box to keep your hands inside as much as possible. Alternatively, it may be a good idea to:
- Weigh an empty bottle outside the glove box and record the weight.
- Take this bottle into the main chamber and decant a small amount of material into it.
- Take this filled bottle out of the glove box and weigh it again.
This ensures that that the powder is accurately weighed without being exposed to ambient conditions. From this, the amount of solvent needed to dissolve this powder can be calculated.
How to Reduce Static
When weighing or decanting powder materials in a glove box, electrostatic charge can become a problem. The system is grounded, which should help significantly reduce issues with static charge. If you still find issues with static build up (such as on glass substrates), we recommend that you wear nitrile gloves over the butyl rubber gloves. Additionally, ionizers or anti-static guns can be used to reduce the amount of static.
Glove Box O2/H2O Levels Increasing
If the moisture and oxygen levels are gradually increasing, begin by checking that the circulation system is functioning.
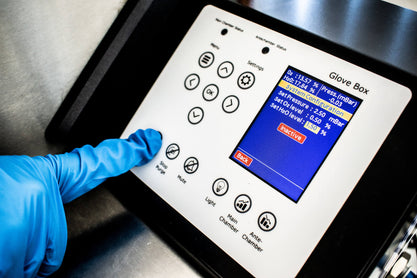
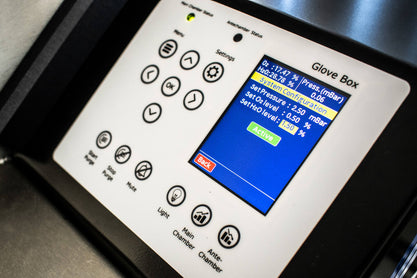
If you are using an Ossila Glove Box, check the automated purge system. To do so, go to the settings page and check that automatic purging is "Active", not "Inactive". To activate, simply press "Start Purge" while on the settings page. This automated purge can be turned off by pressing "Stop Purge" on the settings page.


If the glove box is held at overpressure, a small leak should not cause an increase in O2 or H2O levels. However, it is always worth checking for leaks if the O2 levels are continually rising.
Other factors to consider are:
- Do the O2/H2O levels increase when opening the antechamber? If so, it could the antechamber door seal. If the contamination levels increase noticeably when you put your hands into the glove box, there could be a hole in the gloves.
- Do the O2/H2O increase when the system is purging? If so, the inlet tubing or nitrogen source may be compromised, allowing oxygen or moisture to enter the system. Check along the inlet pipe and at feedthroughs for leaks or holes. Replace the feedthroughs or inlet pipe as necessary.
- If no leak can be located, check the oxygen sensor board. The oxygen sensor may need replacing. The sensor board can become damaged if working with organic solvents or using high temperatures.
Glove Box

Learn More
 Glove Box Leaks
The most common cause of leaks is human error, either as a result of not following operating procedures correctly or from accidental damage.
Read more... Glove Box Leak Test
If you suspect a leak, you can perform a leak test using the Ossila Glove Box pre-programmed leak test.
Read more...